Some individuals can’t use their hands to touch their iPad directly. So we’ve created smart, customizable scanning patterns to help them reach their potential through scanning. <em>In fact, we’ve even created our Core Column structure with their needs in mind!</em> Because Talk Suite is arranged so logically on every page, scanners have an easier time finding what they need.
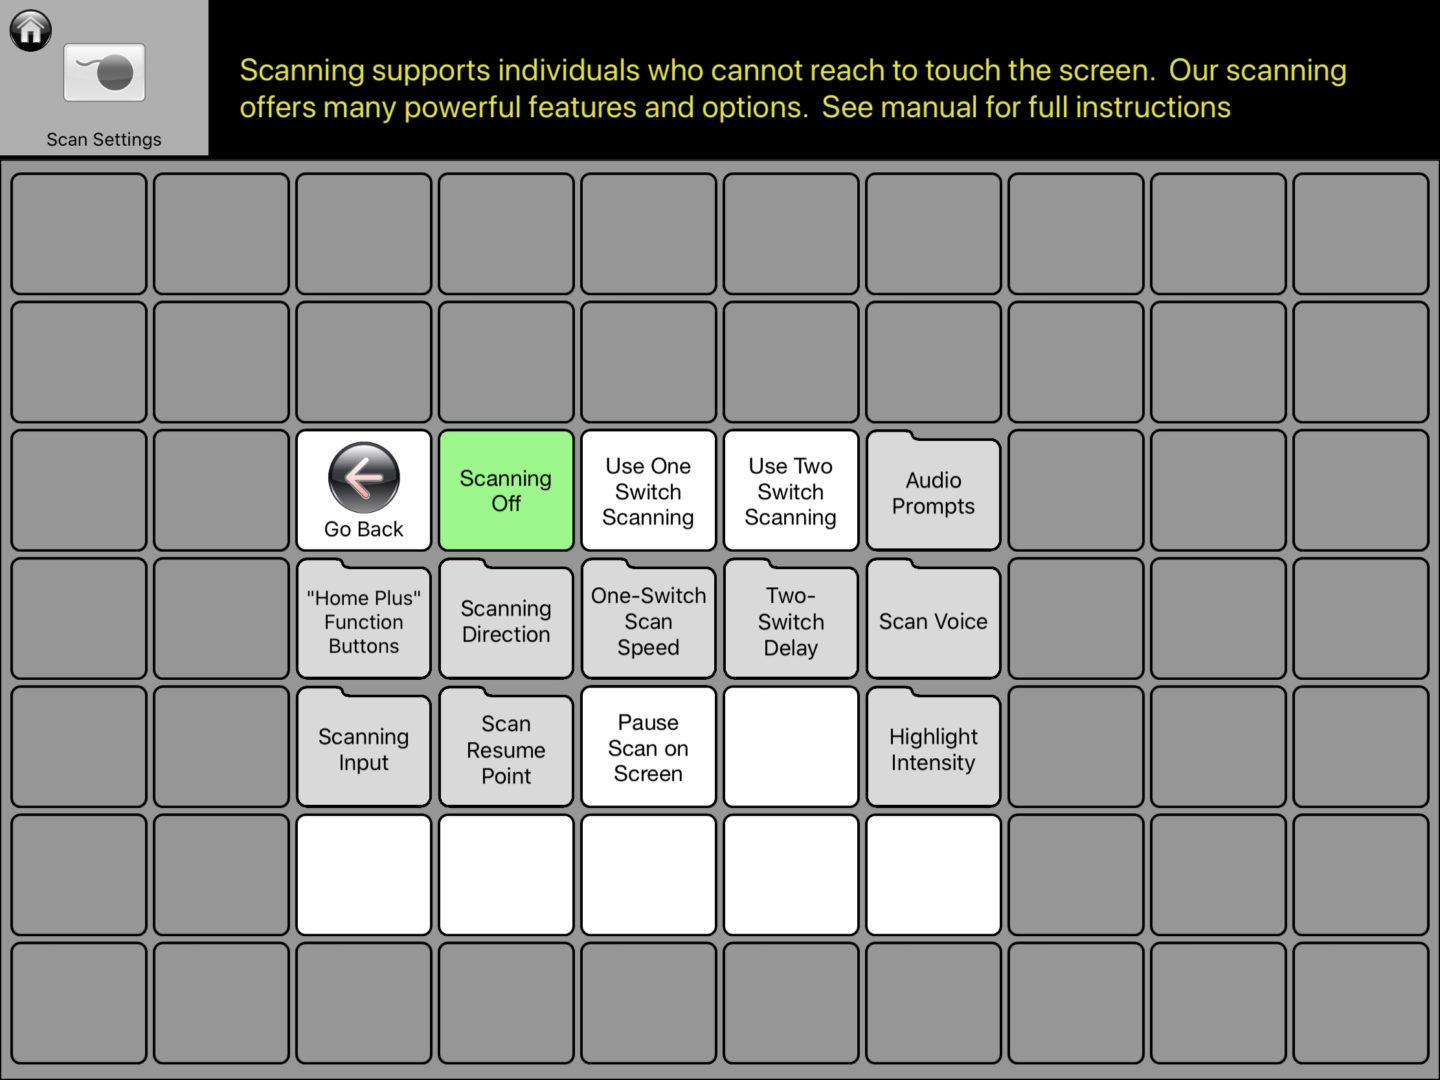
Talk Suite also offers a full range of powerful scanning customizations. Single Switch scanning… Double Switch scanning…. and using the iPad screen as a scanning switch. Our scanning patterns have Highlight options…. Pause and Restart options…. and Delay Times.
We also offer powerful tools for Audio scanners, who need to use AAC using only their ears.For example, you can have the scanning go through headphones, but have the person’s voice come out of the iPad.
Explore all our options below. And see how much is possible.

Start with Settings. In the Settings areas, you will find many powerful scanning settings. It’s really a good idea to talk to an SLP about what will be best for your child. In the meantime, check out our fantastic Scanning videos in the Experts section and start learning how to support your child!

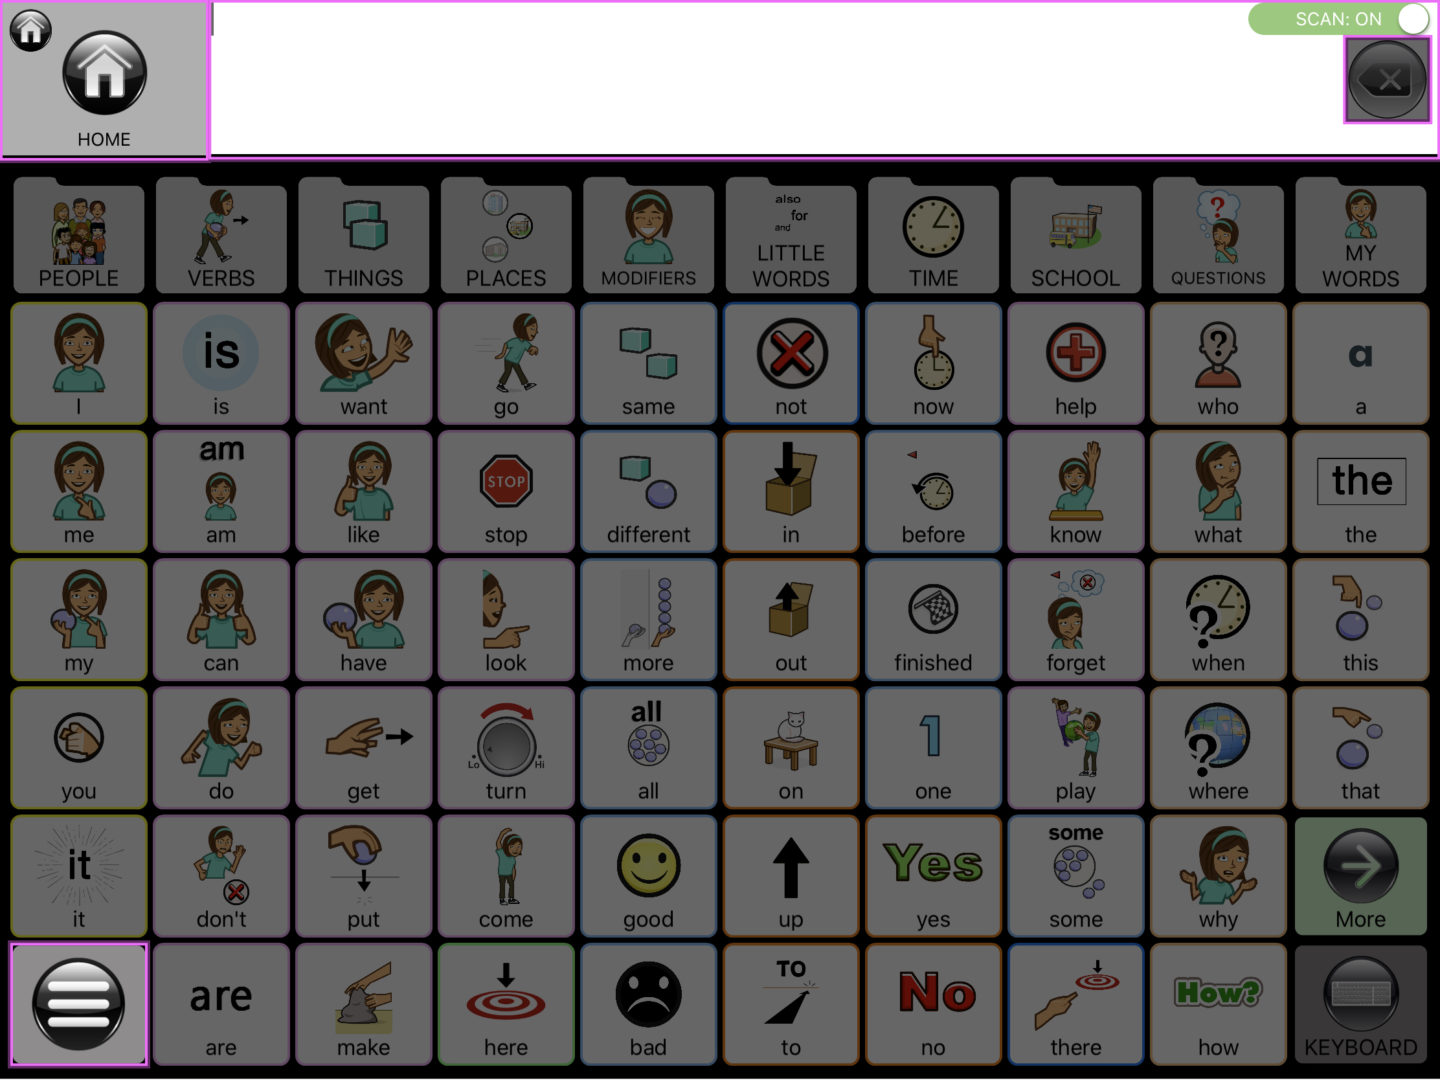
Scanning Begins. When you turn on scanning, you’ll see the SCAN ON button appear in the upper right hand corner and you will immediately start scanning You can always turn it off for a moment to help someone get to a new page, and then turn it right on to go back to scanning.
To use scanning, you’ll need to use a scanning “Switch”. (Here’s a good one from AbleNet: https://www.ablenetinc.com/technology/switches/wireless-switches/blue2-bluetooth-switch) and you’ll need to position it where it can be easily hit.
Sometimes that’s on a tray near a hand. Sometimes it can be near someone’s head or foot. The important thing is that a person is able to consistently touch it.
When you’re scanning with Talk Suite, you always start with “Home Plus.” These are the key function buttons that you use so often (Talk Suite Home, Back, Readout, etc.). You an make this initial group of buttons larger or smaller in the Scan Settings.

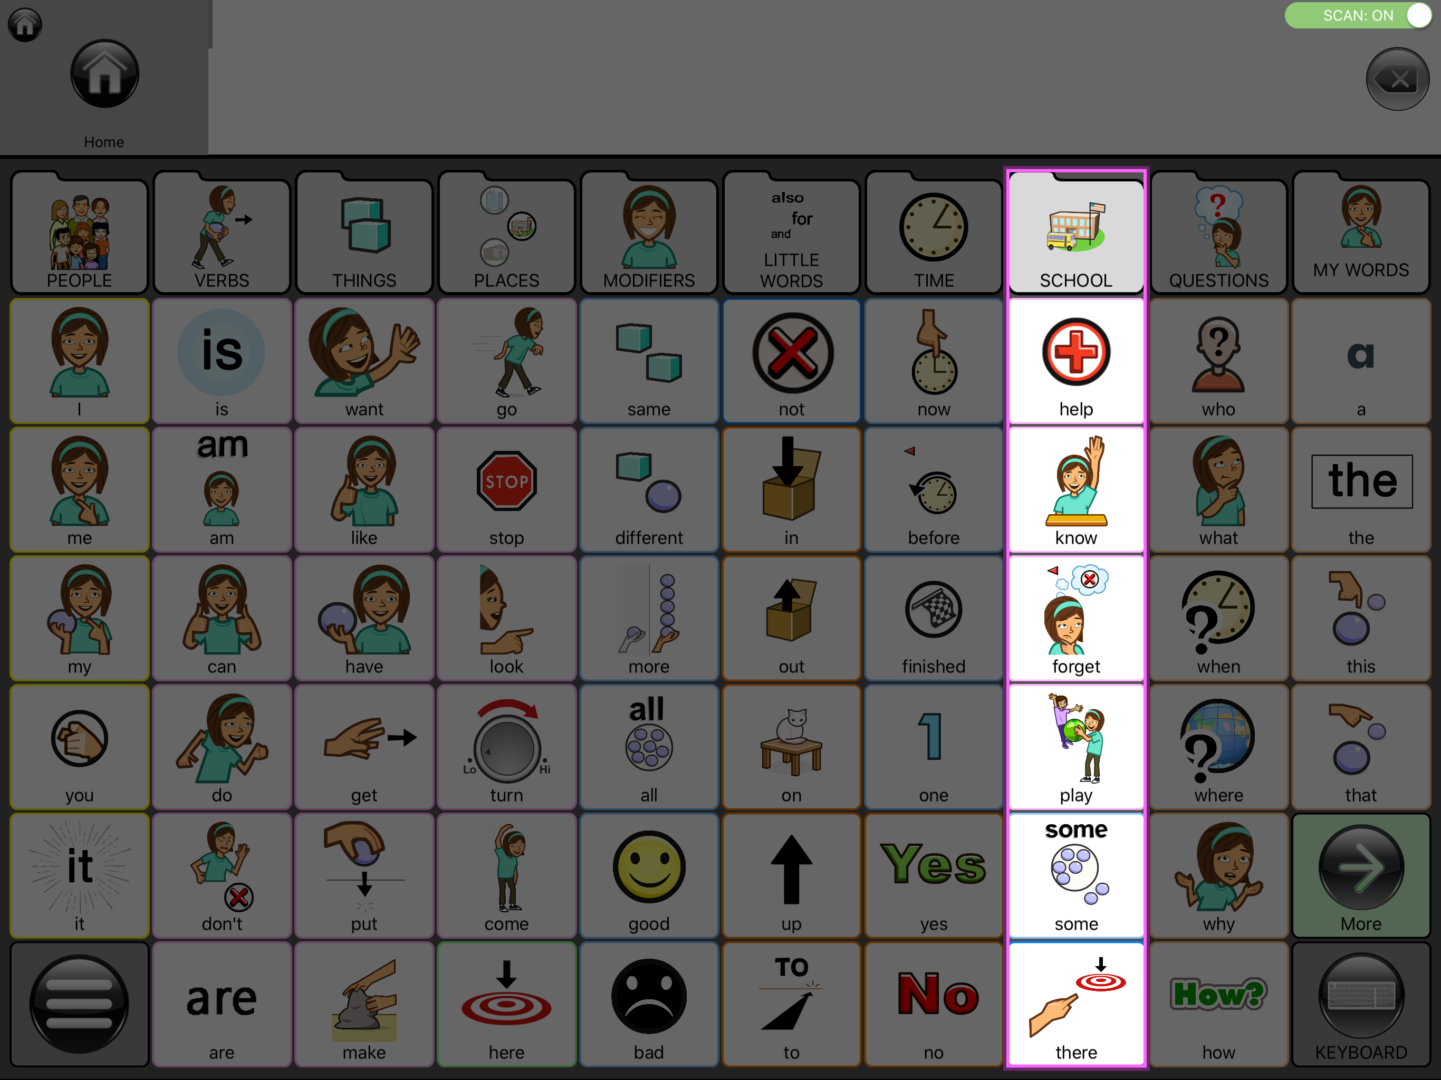
Column Scanning. Once the “Home Plus buttons are scanned as a group, Talk Suite then scans column by column.
If you are doing One Switch scanning, the cursor will begin to move across the columns, one by one. Once you see the column that contains the button or folder you want, tap the Switch and it will be selected. The Cursor will then start to scan down that column.
If you are doing Two Switch scanning, the cursor will move across the columns, one by one, as you tap the first switch (the “Step” or “Next” switch). Once you see the column that contains the button or folder you want, tap the second Switch (the “Select” or “Activate” switch) and it will be selected. The next push of the first “Step” button will then begin your scanning down that column.
Talk Suite’s scanning is slightly different as it scans Columns first, and then the Rows. This makes a lot of sense as it more closely mimics how we look at lists (down columns) versus how we read (left to right.)

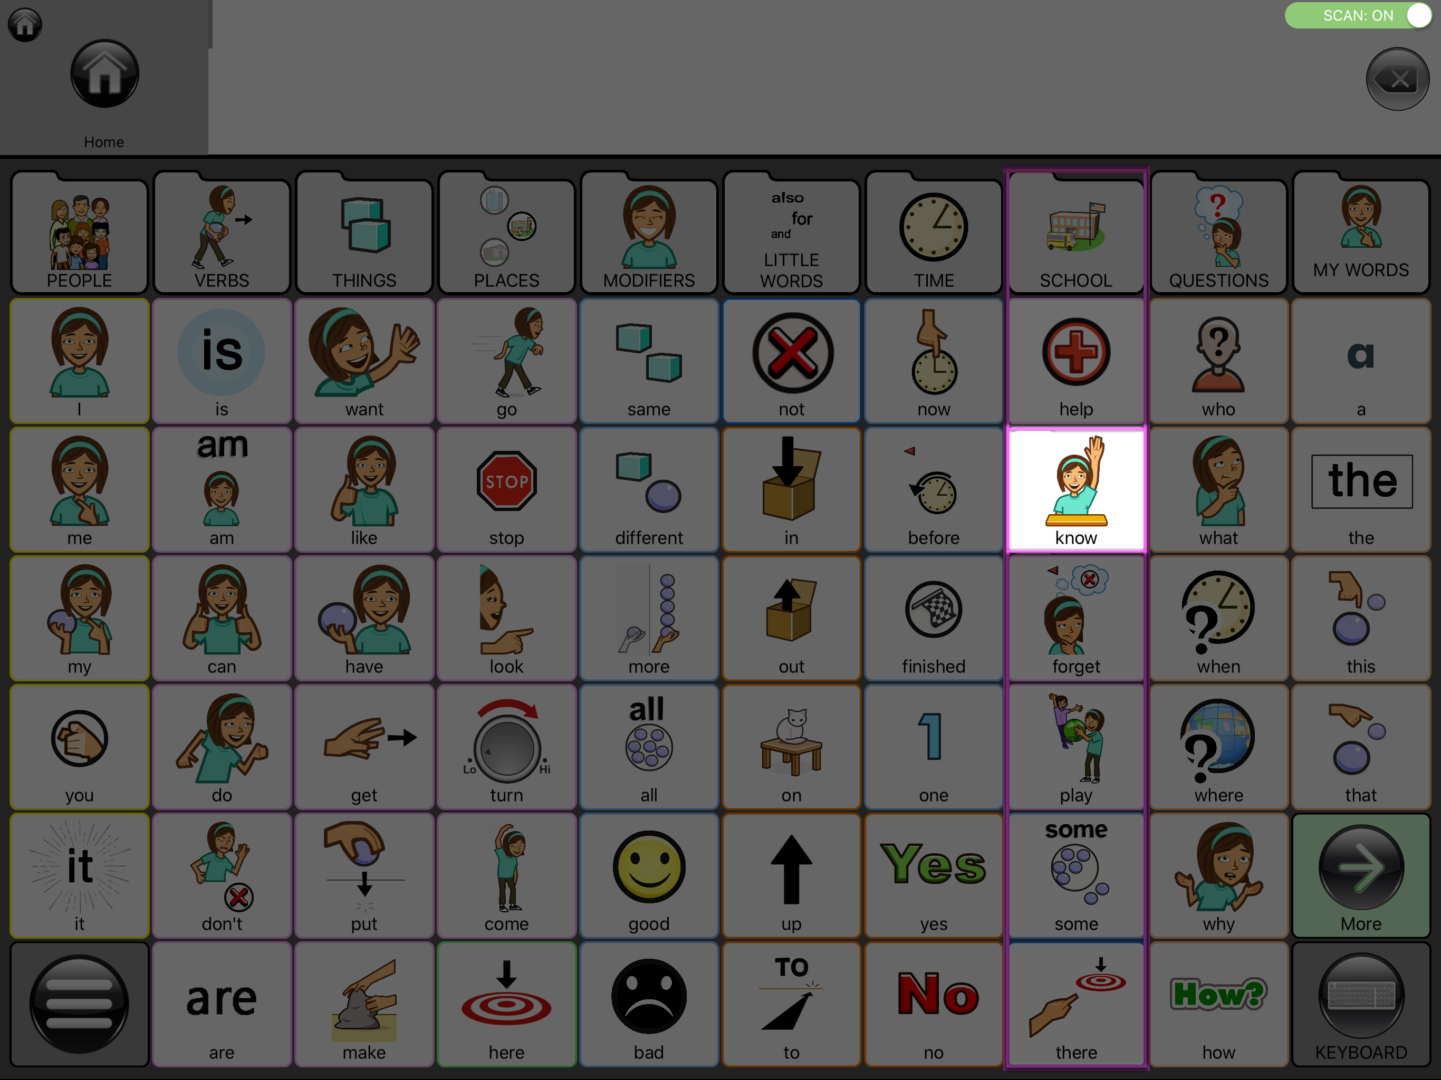
Selecting a Specific Button. Once you select a specific column, the highlight will move button by button down that column until you see what you want.
If you are doing One Switch scanning, the cursor will begin to down that columns, button by button. Once you see the button you want, tap the Switch and that button will be selected. If it is a word, that word will either speak and/or go into readout… depending on your settings.
If you are doing Two Switch scanning, the cursor will move down that columns, button by button, each time you hit the Step switch.. Once you see the button you want, tap the Select switch and that button will be selected. If it is a word, that word will either speak and/or go into readout… depending on your settings.
Once you select a button, the highlight returns to the “Home Plus” buttons on that page, or on the page which you would typically return to. You can change that in settings if you prefer to stay on the same column.
Scanning isn’t easy. It can take a while to master, even years. But as you do it, you’ll also see and feel your child progressing and getting more and more language and expression.
Check out our page on Scanning to learn more!